There are many hosting companies out there. Bluehost just happens to be our favorite of the affordable, shared-server options we’ve come across.
We build most of our sites with WordPress, and Bluehost is the only hosting service officially recommended by WordPress. But to be honest, that has little to do with our decision to use Bluehost. In our experience, we’ve found that they have an excellent balance of affordability, robust features, and top-notch customer service. If you’re looking for a hosting company, it’s easy to get set up with Bluehost.
Step-by-step guidelines for setting up your new Bluehost account:
 Sign up with Bluehost
To get started, visit Bluehost’s home page. Note: You’ll receive discounted rates if you use the button below!
Sign me up for Bluehost
Once there, click the “Sign Up Now” button on the Bluehost home page.[clear-line]
 Choose a hosting plan
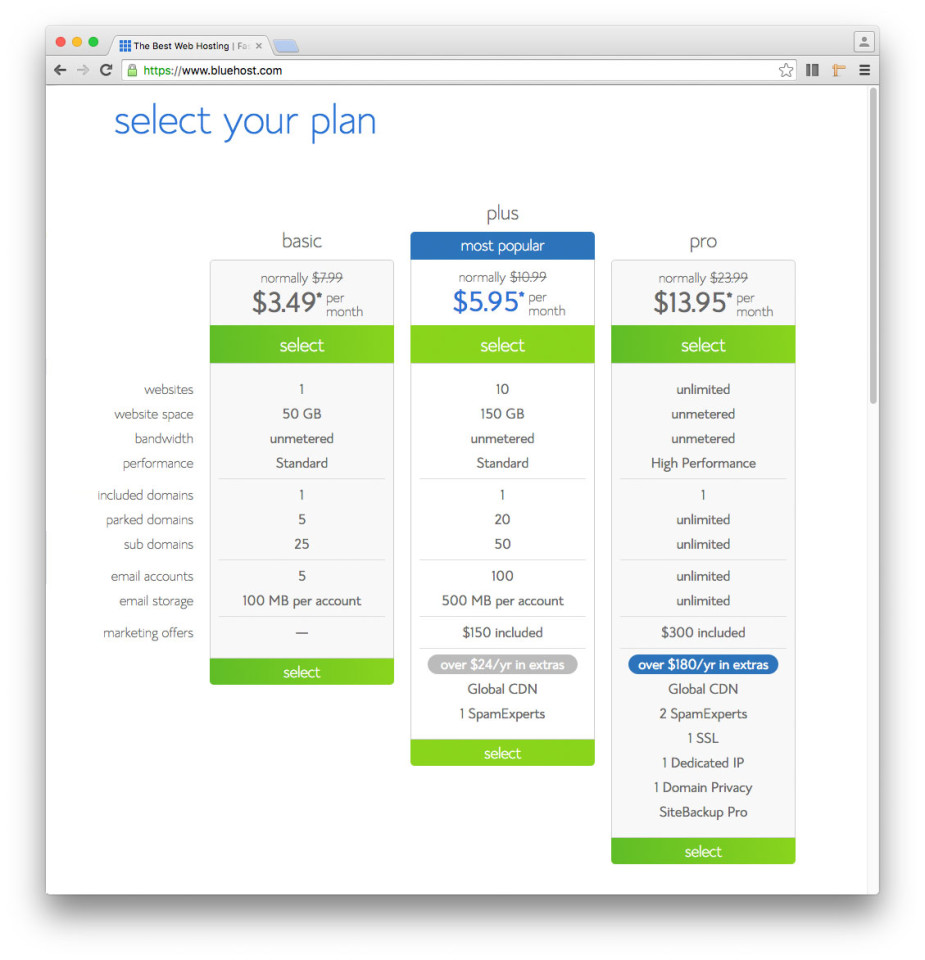
Bluehost offers 3 levels of shared hosting. The plan differences are related to storage space, number and storage amounts of email accounts allowed, and speed. For most small- to medium-sized businesses, we recommend the Plus package, but feel free to select the package that best suits your needs.[clear-line]
 Choose/assign a domain name (URL)
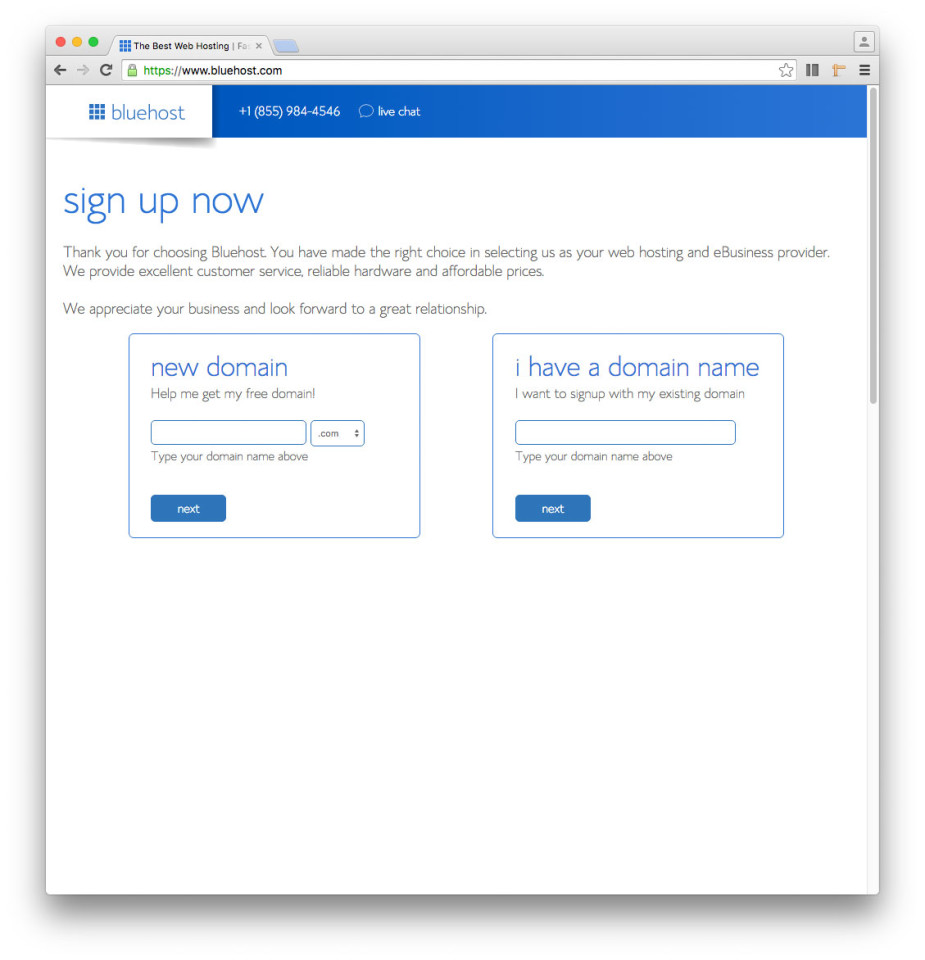
Next, you need to choose a domain name for your site. If you already own a domain name, enter it on this screen. If you don’t already own a domain name, you can purchase one right in the sign-up process, and it comes free with your new WordPress hosting account purchase! [clear-line]
Enter your personal information
Once you’ve entered a domain name, you’ll be taken to a page where you will fill in your personal information. [clear-line]
 Choose the hosting duration you’d like to pre-pay
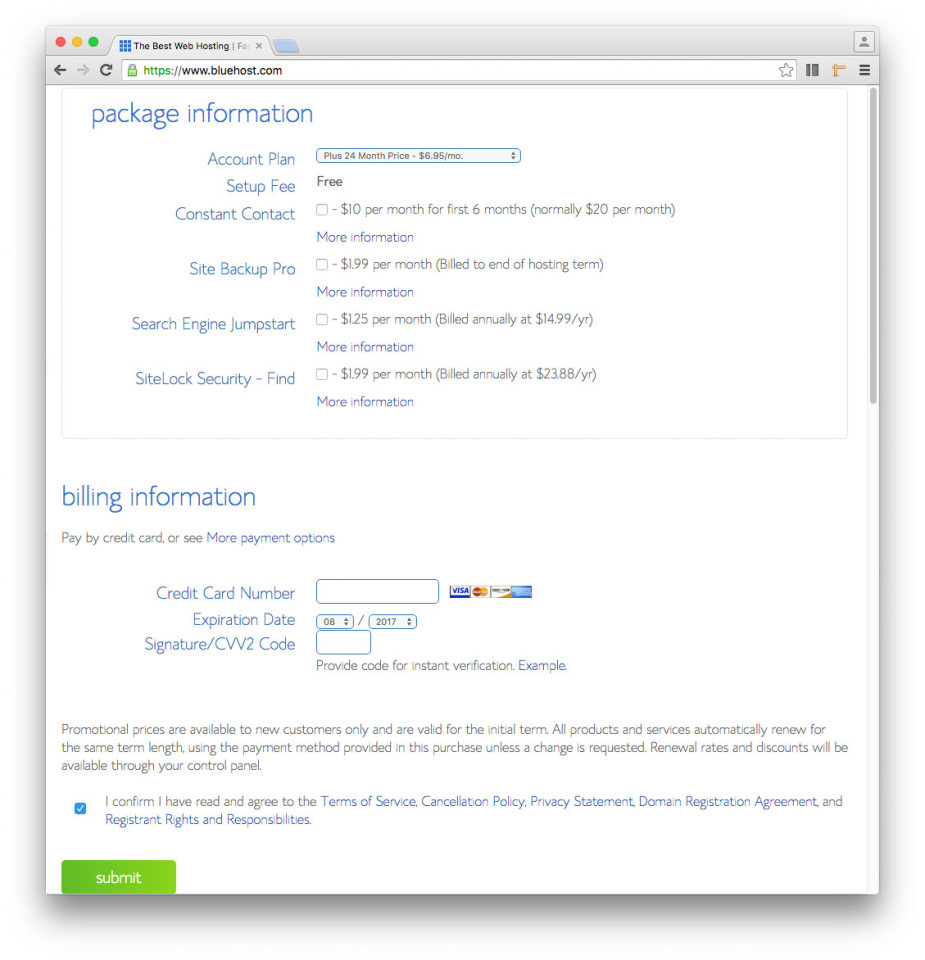
Then, you’ll choose which hosting package you want to pre-pay. Shared hosting is priced at 12, 24 and 36-month terms. The longer term you purchase, the lower the monthly rate will be. We recommend using the 36-month option and locking in these introductory rates for as long as possible. Rates after the introductory period can be found here. [clear-line]
Additional options
There are few other offers provided at sign up, which you can include at your discretion. One we recommend is Domain Privacy, a paid service that allows personal information to be kept private on WHOIS databases. [clear-line]
Create a password and get started
After you’ve filled in your information and chosen your hosting package, click the “Next” button to complete your purchase. You’ll then be asked to create a password for your account. You can use the Password Generator to create a strong and secure password, or create one yourself. It is required to have both capital and lowercase letters, a number, and a special character (?!#, etc.) in order to have a strong enough password to protect your account. [clear-line]
